Tutorial 4 of 4
Exporting to Word
Learn to enter demographics and export your Word document.
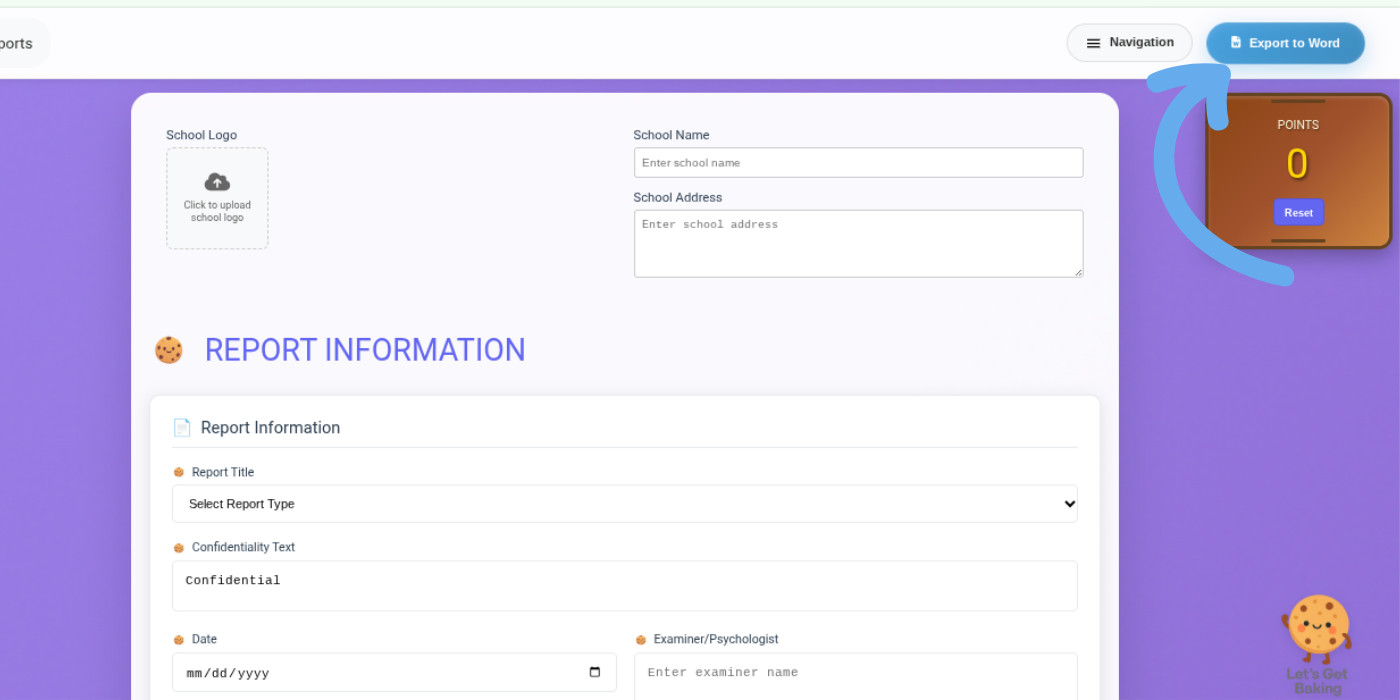
Review your Report and Click Export

Before exporting, review your completed report sections to ensure the content is accurate and ready for finalization.
Only sections containing report text will appear in the exported document. Select the Export to Word button.
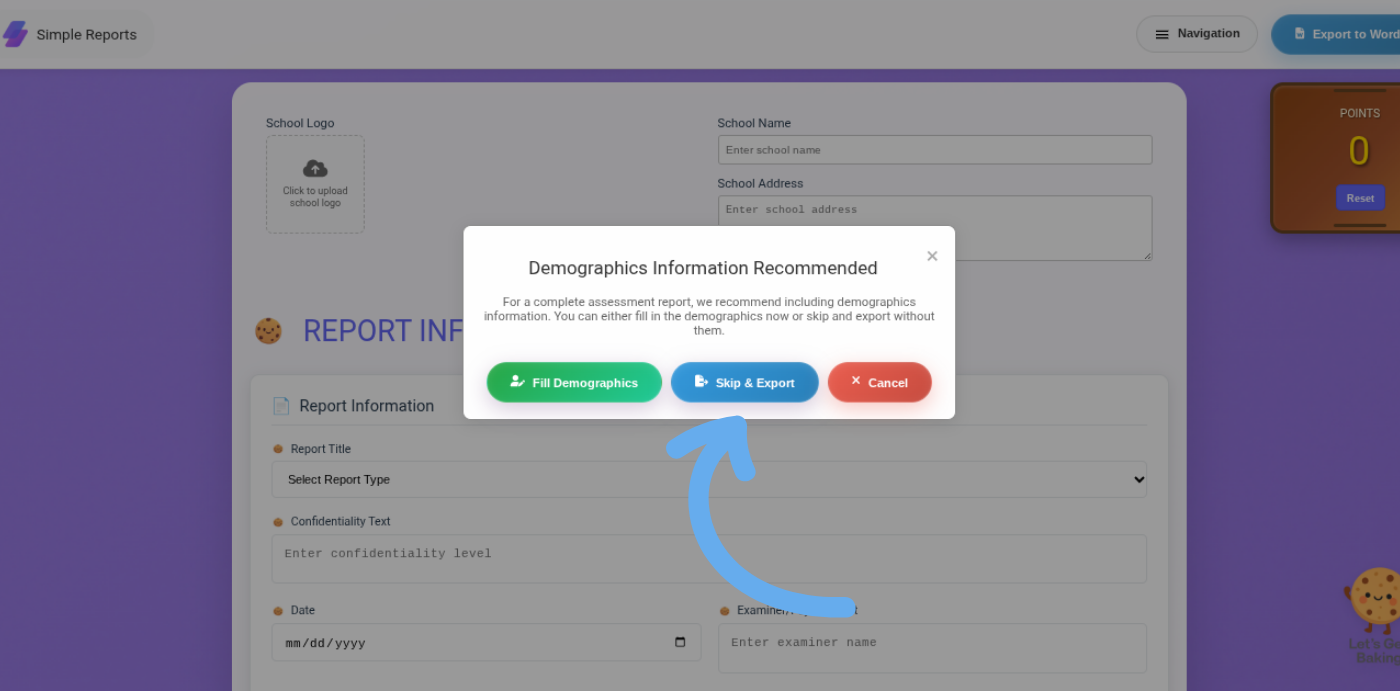
You will be presented with two options:
Skip and Export
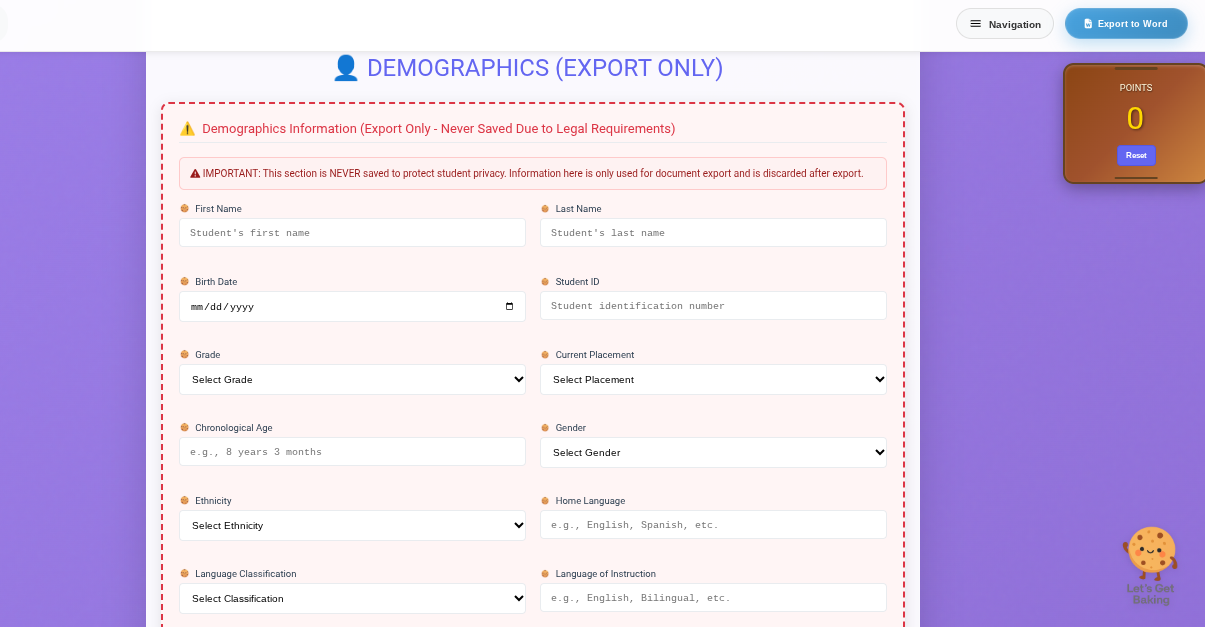
Enter Demographics
Choose your Export Method

Option 1: Skip and Export
Select Skip and Export if you would like to generate your Word document immediately.
Option 2: Enter Demographics
Select Enter Demographics to populate student information within the exported report.
Examples may include:
Student Name
Date of Birth
Grade
School
Evaluation Date

Enter Demographics and Export

After entering demographics, click Skip and Export to generate your final Word document.
The system will automatically insert the demographic information into the appropriate locations within the report.
Step 5: Download Your Report
Your completed report will be exported as a Microsoft Word document for final review, editing, and district-specific formatting if needed.